
- label Talking about sewing...
- favorite 0 likes
- remove_red_eye 997 views
- comment 0 comments
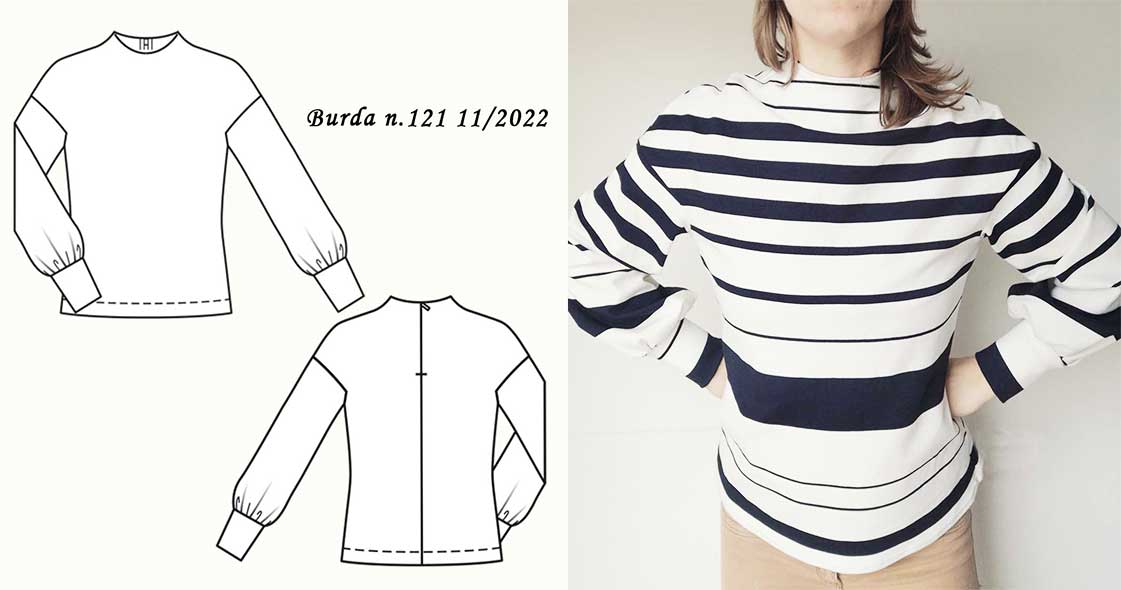
I studied this project a lot because I wanted a turtleneck pullover that was original and at the same time easy to sew.
I must say that this Burda pullover was really easy to sew, and fast too!
It's really true that if you spend a few extra hours in the planning then once you start the work it goes faster and more smoothly.
In this case, the key is to choose the right fabric.
The choice of fabric
The original pattern is proposed in knitted fabric worked in small braids. The instructions recommend using jersey of medium or heavy weight, with good elasticity.
I recommend knitted or fleece-type fabrics.
No light jersey (from tshirt), yes to heavy jersey (even a scuba might work).
I had bought a beautiful cotton jersey in Milano stitch, with white and dark blue stripes, a year ago and had been looking for a project to make with this fabric for some time.
This sweatshirt was the best choice I could make: the fabric glides smoothly over the skin without losing its shape, the collar stays straight and the cuffs wrap tightly around the wrist.
The stripes then.... those are my first great love and the 'mariniere' effect drives me crazy, always!
The size
On choosing the size I had the usual problems I always have with Burda patterns, i.e. following the measurements I should cut a size 40 but if you add the seam allowances it becomes too big.
So to solve this I do the following: I draw the pattern of the size 40 and then I cut it without adding seam allowances, I only put the ones for the bottom hem (not the ones for the sleeves, otherwise they'll be too long).
I learnt this after sewing several Burda patterns, I think everyone has to find a compromise to adapt the measurements of the patterns to their own physicality.
If you'd like to leave a comment on your experience with Burda patterns, write it below the post!
Key steps
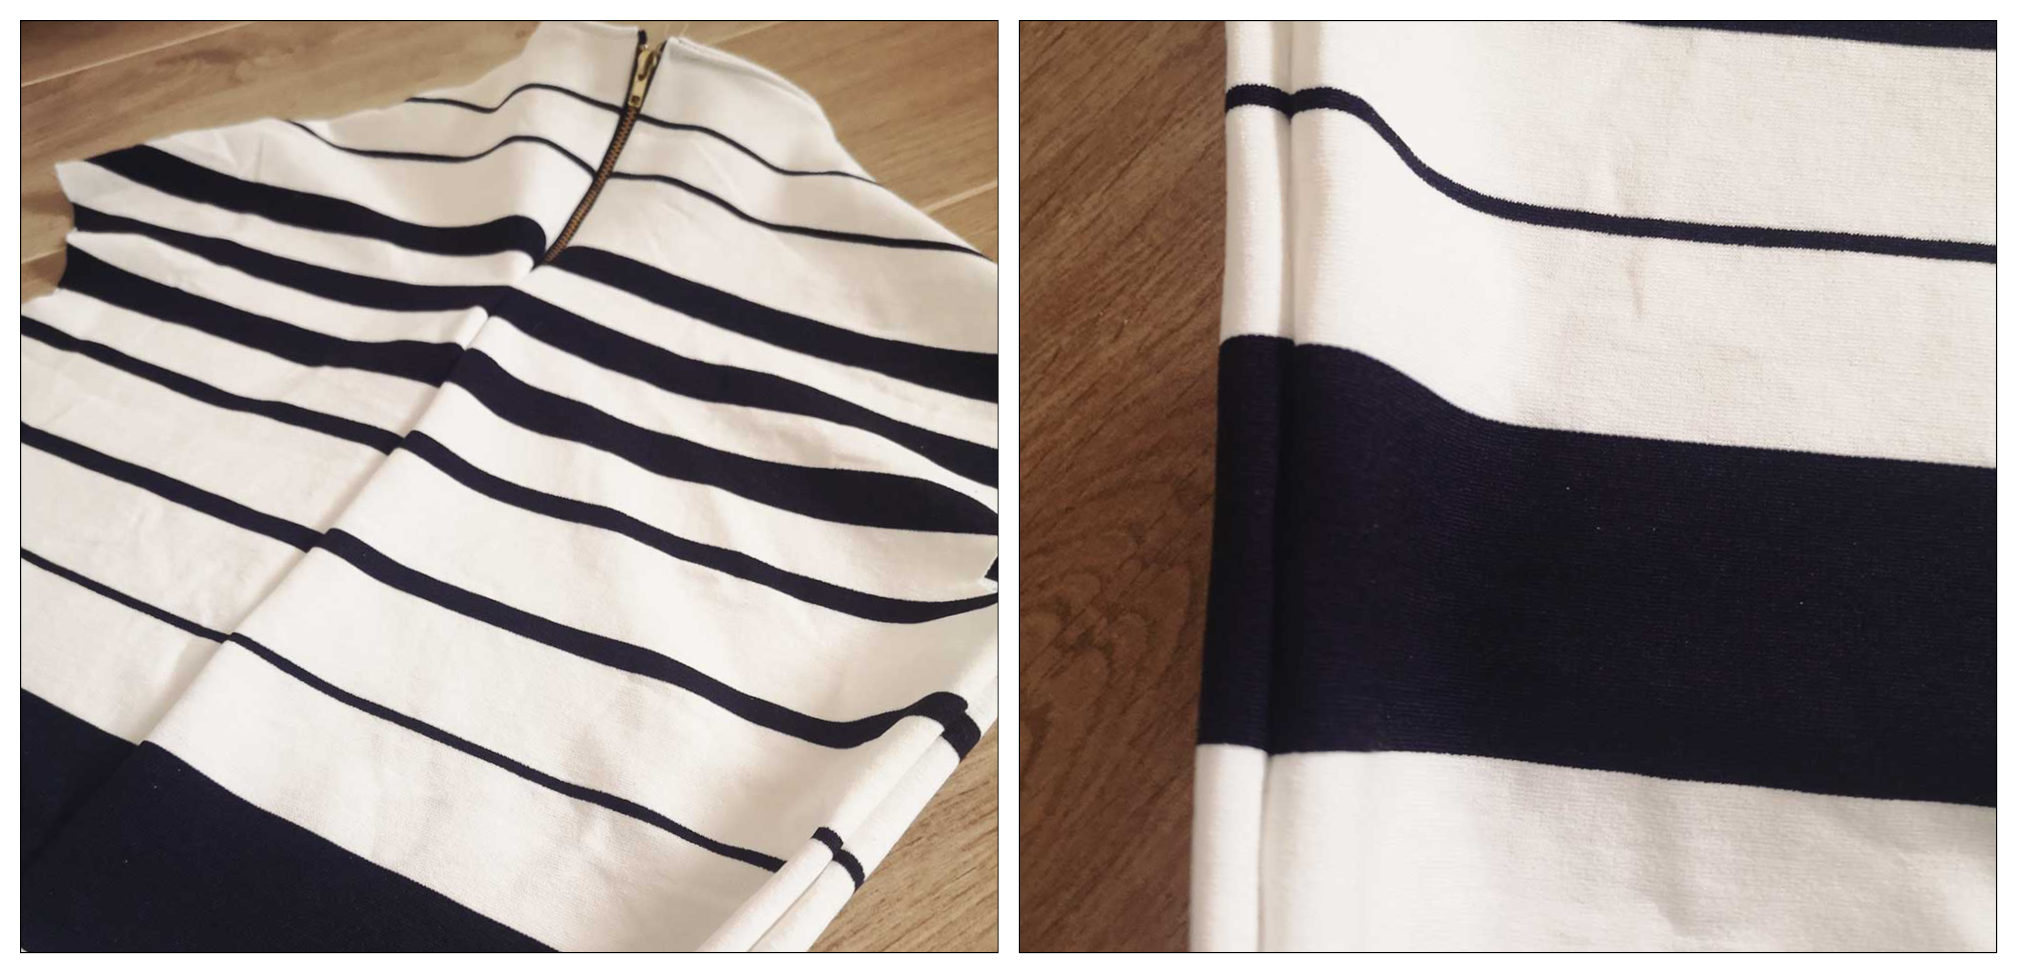
Cutting the fabric
Precision in cutting a striped fabric is everything for this project. Well begun is half done, and if we cut this pattern with extreme precision, then when we sew it, it's all satisfaction (what fun we'll say when the lines of the various parts match!). So let's arm ourselves with a lot of patience and position the various parts of the pattern on the fabric, imagining what the joining points will be and how the various lines will join. Not only for the front and back, but let's also make sure that the two sleeves have the lines at the same height so that when sewn together they are absolutely identical!
The reinforcements
Before starting, the instructions suggest to apply fliselin to the neck folds. I did this but in hindsight I saw that it wasn't necessary: if the fabric is of good quality and of average weight there is no need to reinforce for this project.
The zip
Here I suggest using a zip foot to attach the zip, attach it flush to the two parts of the back and then join the two parts together.
The seams
To make the work as neat as possible, I did it this way: for each seam I first did a zigzag stitch with the sewing machine and then went over with the overlock.
It may not be the most scholastic procedure but in my case the zigzag stitching allowed me to see the final effect in advance with the advantage of being able to unstitch it easily (almost like basting but stronger and faster)
while the stitching with the taglicuci finished the work, reinforcing the first seam and cleaning the inside.
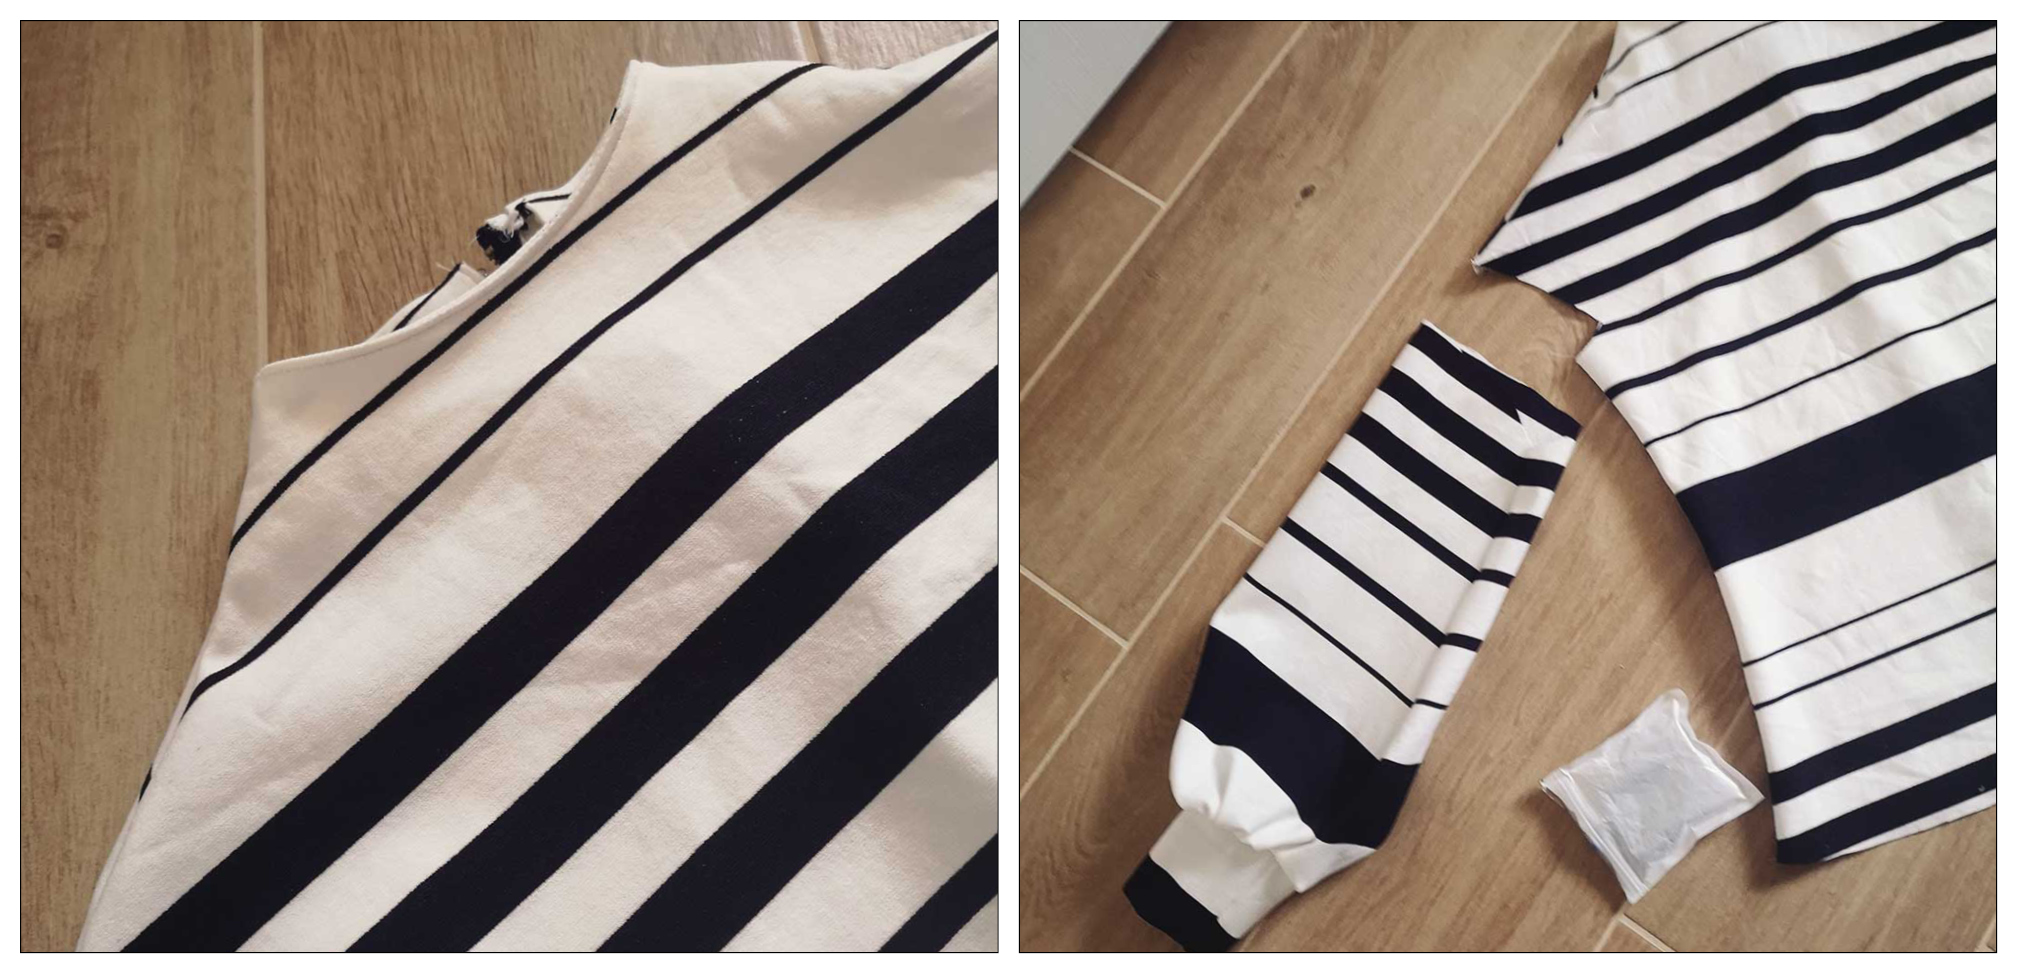
The sleeves
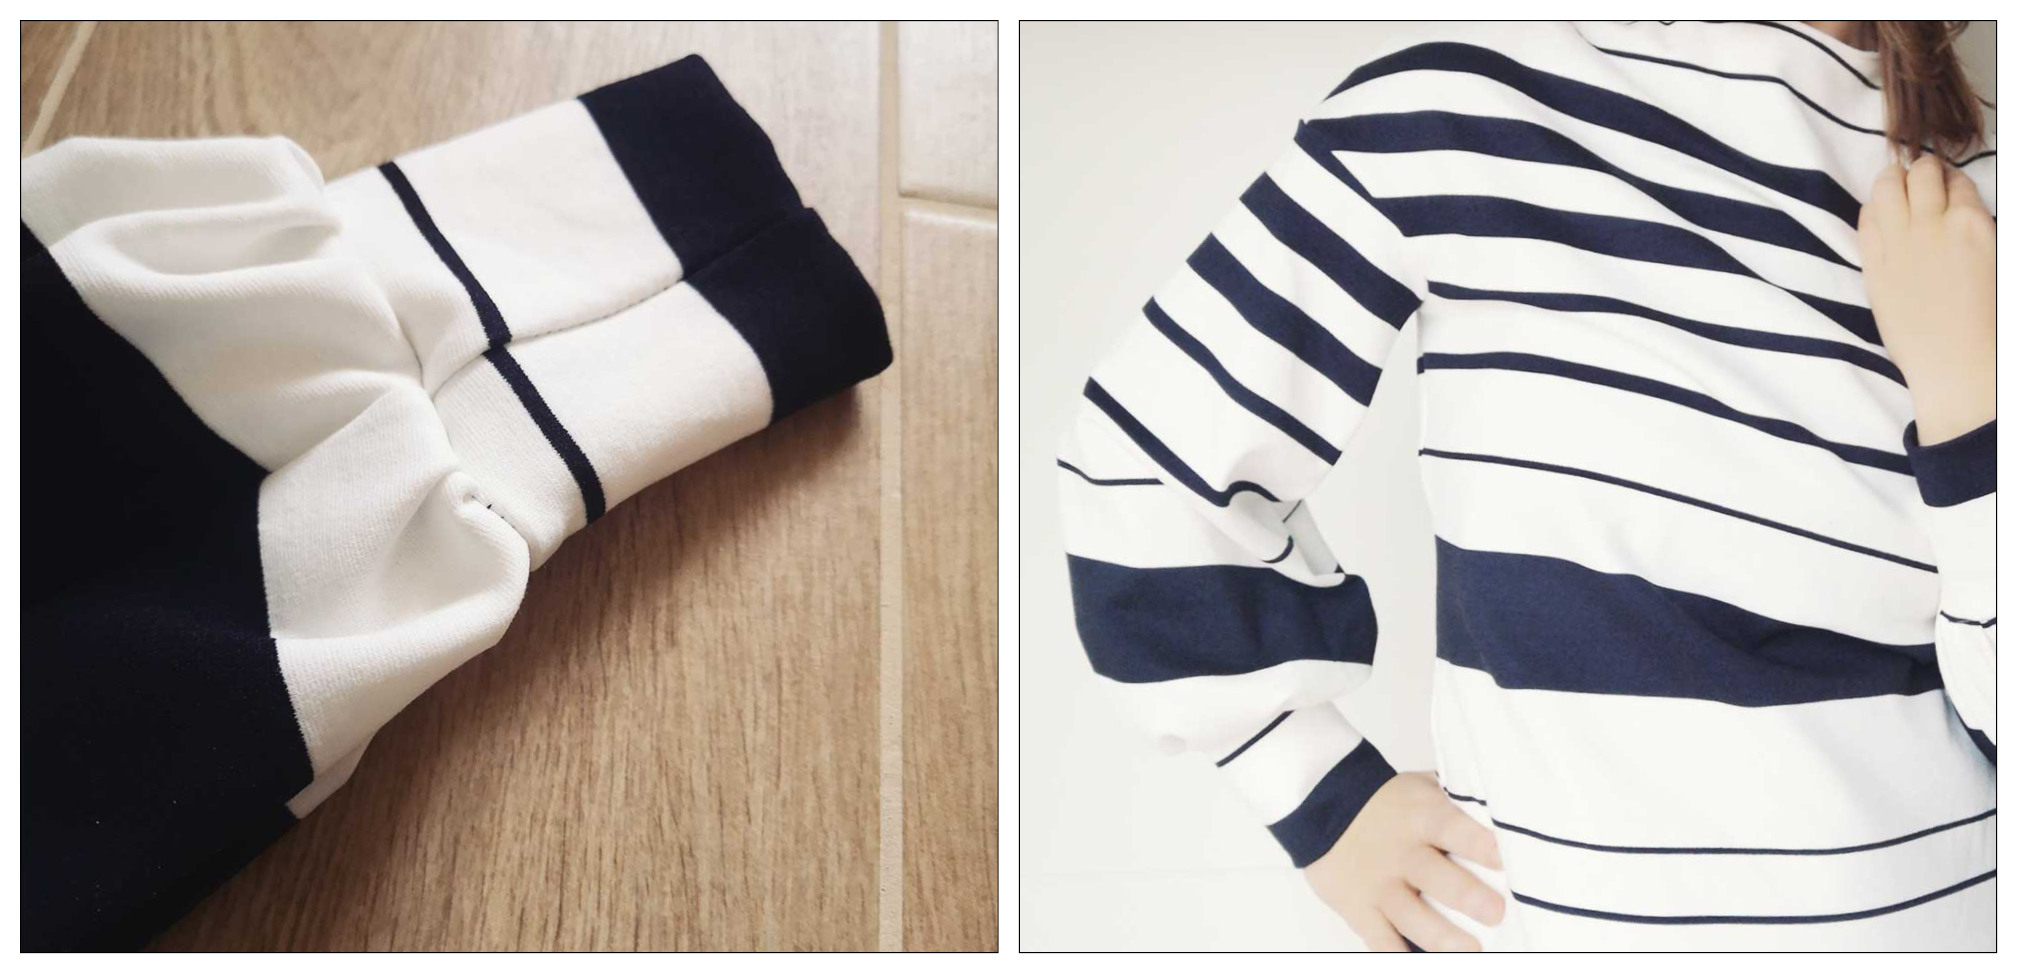
Here, after closing them lengthwise, we have to attach them to the cuff creating the gathering.
A bit of hand sewing is needed, so with a soft stitch we sew along the entire edge of the sleeve and pull the ends to curl it; curl until it is the same size as the cuff. We distribute the gathering over the whole cuff evenly.
Then, still by hand, with a basting, we attach the sleeve to the cuff. Take your time to do this step because it is essential for the final effect of these sleeves which are really beautiful and give that unique, tailored elegance to the knitwear. Once we have finished basting we can proceed with the stitching, I always zig zag + seam ripper.
Finally, we attach the sleeves to the bodice: this step, which is often difficult with classic armholes, is facilitated here thanks to the low armhole (which gives a trapeze shape to the bodice).
Once you have got this far, you will find it really easy to make the final sprint!
The hem
The instructions suggest that you trim the edge (zig zag or purl cutter) and then fold with a double needle.
If you don't have a double needle, you can also use a straight seam with a single needle.
What I suggest is that it be tone-on-tone with the fabric.
Final rating for this pattern? 5/5 stars!
Difficulty? Easy as indicated in the magazine.
Suitable for beginners who want to make a good impression ;)
Will I sew something else on it? I think so, I want to sew a pullover with a knitted fabric, like in the original Burda.

Comments (0)